There’s nothing quite like that fresh-out-of-the-box look of brand-new white sneakers. But let’s be real—keeping them that way is the hard part. The secret to how to clean white sneakers really comes down to a two-part process: first, you have to get all the surface-level dirt and grime off, and then you follow up by brightening the material itself back to its original glory. The good news is, with a few common household items and the right approach, you can get your favorite pair looking almost new again.
Why Your White Sneakers Need Special Attention
White sneakers aren’t just shoes; they’re a core part of your style. Whether you’re rocking classic canvas, sharp leather, or buttery-soft suede, each material comes with its own set of cleaning challenges. Just throwing them into the washing machine or grabbing the first cleaner you see under the sink can be a recipe for disaster. I’ve seen it all: yellowing, stubborn watermarks, and even cracked leather. The first and most crucial step is simply understanding what your sneakers are made of.
And it’s not just you trying to keep your kicks clean. The global obsession with pristine footwear has turned shoe care into a massive industry. In 2023, the market was valued at a staggering USD 4.74 billion and is only expected to climb. In style-conscious places like the UAE, for example, proper sneaker maintenance is now the norm, fueled by youth culture and a serious appreciation for looking sharp. You can learn more about what’s driving this global trend by reading the full research.
Different Materials Demand Different Methods
Think about it this way: you wouldn’t wash a delicate silk blouse the same way you wash your favorite pair of rugged jeans. The same logic holds true for your shoes. Every material—canvas, leather, suede—reacts differently to water, cleaners, and the friction from scrubbing.
- Canvas: It’s a classic for a reason—it’s tough. But it also soaks up dirt and spills like a sponge. If you scrub too hard, you can easily fray the fabric. And if you don’t dry them just right, you’ll be left with those dreaded yellow tide marks. A gentle touch is key here.
- Leather: Leather is a bit more forgiving when it comes to dirt, but it’s incredibly sensitive to harsh chemicals and getting too wet. The wrong cleaner can strip its natural oils, leaving the material dry, brittle, and prone to cracking.
- Suede & Nubuck: These are the high-maintenance ones. Water is their biggest enemy, often leaving behind permanent stains and ruining that soft, velvety texture. For these, a mostly ‘dry’ cleaning method is your only safe bet.
Honestly, the biggest mistake I see people make is using one generic cleaning method for all their sneakers. Just taking a minute to figure out the material is the single most important thing you can do to prevent ruining a perfectly good pair of shoes.
To make things easier, I’ve put together a quick cheat sheet that breaks down the best approach for each material.
Quick Guide to Cleaning by Sneaker Material
Here’s a simple table to help you grab the right tools for the job based on what your sneakers are made of.
| Sneaker Material | Best Cleaning Method | Key Supplies |
|---|---|---|
| Canvas | Gentle Hand-Wash or Machine Wash (in a bag) | Baking Soda Paste, Mild Detergent |
| Leather | Gentle Hand-Wipe | Microfiber Cloth, Mild Soap, Leather Conditioner |
| Suede/Nubuck | Dry Brushing & Spot Treatment | Suede Brush, Suede Eraser |
Think of this as your starting point. Now, let’s get into the nitty-gritty of how to tackle any stain on any material, so you can confidently bring your white sneakers back from the brink.
Building Your Sneaker Cleaning Toolkit
Before you can even think about tackling those stains, you’ve got to have the right tools on hand. Having a dedicated kit ready to go means you can jump on a scuff or a spill immediately, which is often the key to preventing a permanent mark. I like to think of it as a first-aid kit for my favorite shoes.
At the heart of any good cleaning setup is a solid set of brushes. You wouldn’t use the same brush on a delicate fabric upper as you would on a tough rubber sole, so variety is essential. A soft-bristle brush is your go-to for gently working a cleaning solution into materials like canvas or mesh without roughing them up. For the dirty work on midsoles and outsoles, a medium-bristle brush has the backbone to scrub away ground-in dirt.
The Essential Supplies
Beyond the brushes, a few other simple items are absolute must-haves for getting that fresh-out-of-the-box look. These supplies are cheap but they’re what really elevate your cleaning game.
- Microfiber Cloths: Ditch the old t-shirts and paper towels. Microfiber cloths are super absorbent and, most importantly, lint-free. They’re perfect for wiping away suds and drying your sneakers without leaving fuzzy bits behind.
- A Small Bowl: Nothing fancy needed here. Just grab a small bowl you can dedicate to mixing up your cleaning solutions.
- Old Toothbrush: This is your secret weapon for all the little nooks and crannies. It’s perfect for scrubbing around eyelets, along seams, and in the detailed grooves of the outsole where bigger brushes just can’t fit.
Here’s a pro-tip I’ve learned over the years: don’t use a single tool for the whole shoe. The real magic happens when you use different brushes and cloths for each specific part—a soft touch for the upper, some elbow grease for the sole. That’s the difference between a quick wipe-down and a real restoration.
DIY vs. Commercial Cleaners
Now for the cleaning solution itself. You basically have two choices: go the homemade route or pick up a specialized product.
A simple paste made from baking soda and white vinegar is a time-tested classic, and for good reason. It’s an incredibly effective and wallet-friendly option for pulling stains out of canvas and other fabrics. The gentle abrasion from the baking soda and the cleaning properties of the vinegar work together beautifully on everyday grime.
On the other hand, commercial sneaker cleaners are scientifically formulated to handle a wider variety of materials and tougher stains. Many also contain conditioners to nourish materials like leather and suede. While they do cost a bit more, they can offer some peace of mind, especially when you’re cleaning an expensive or delicate pair of sneakers.
If you want to explore more advanced maintenance routines, our ultimate guide to sports sneaker care has you covered. Ultimately, the choice between DIY and commercial cleaners comes down to what you’re comfortable with, your budget, and the specific needs of your shoes.
Setting the Stage for a Flawless Clean
Before a single drop of cleaner ever touches your shoes, you need to do a little prep work. Honestly, this is what separates a decent job from a truly flawless result. Think of it like priming a wall before you paint—skipping this stage just sets you up for a sloppy finish and more work down the line. The goal here is to make the actual cleaning process smoother and far more effective.
The very first thing I always do is deconstruct the sneakers. Go ahead and pull out the shoelaces and, if they aren’t glued down, take out the insoles too. This isn’t just a casual suggestion; it’s essential for getting into every nook and cranny, especially around the tongue and eyelets where dirt and grime love to accumulate.
Start with a Good Dry Brush
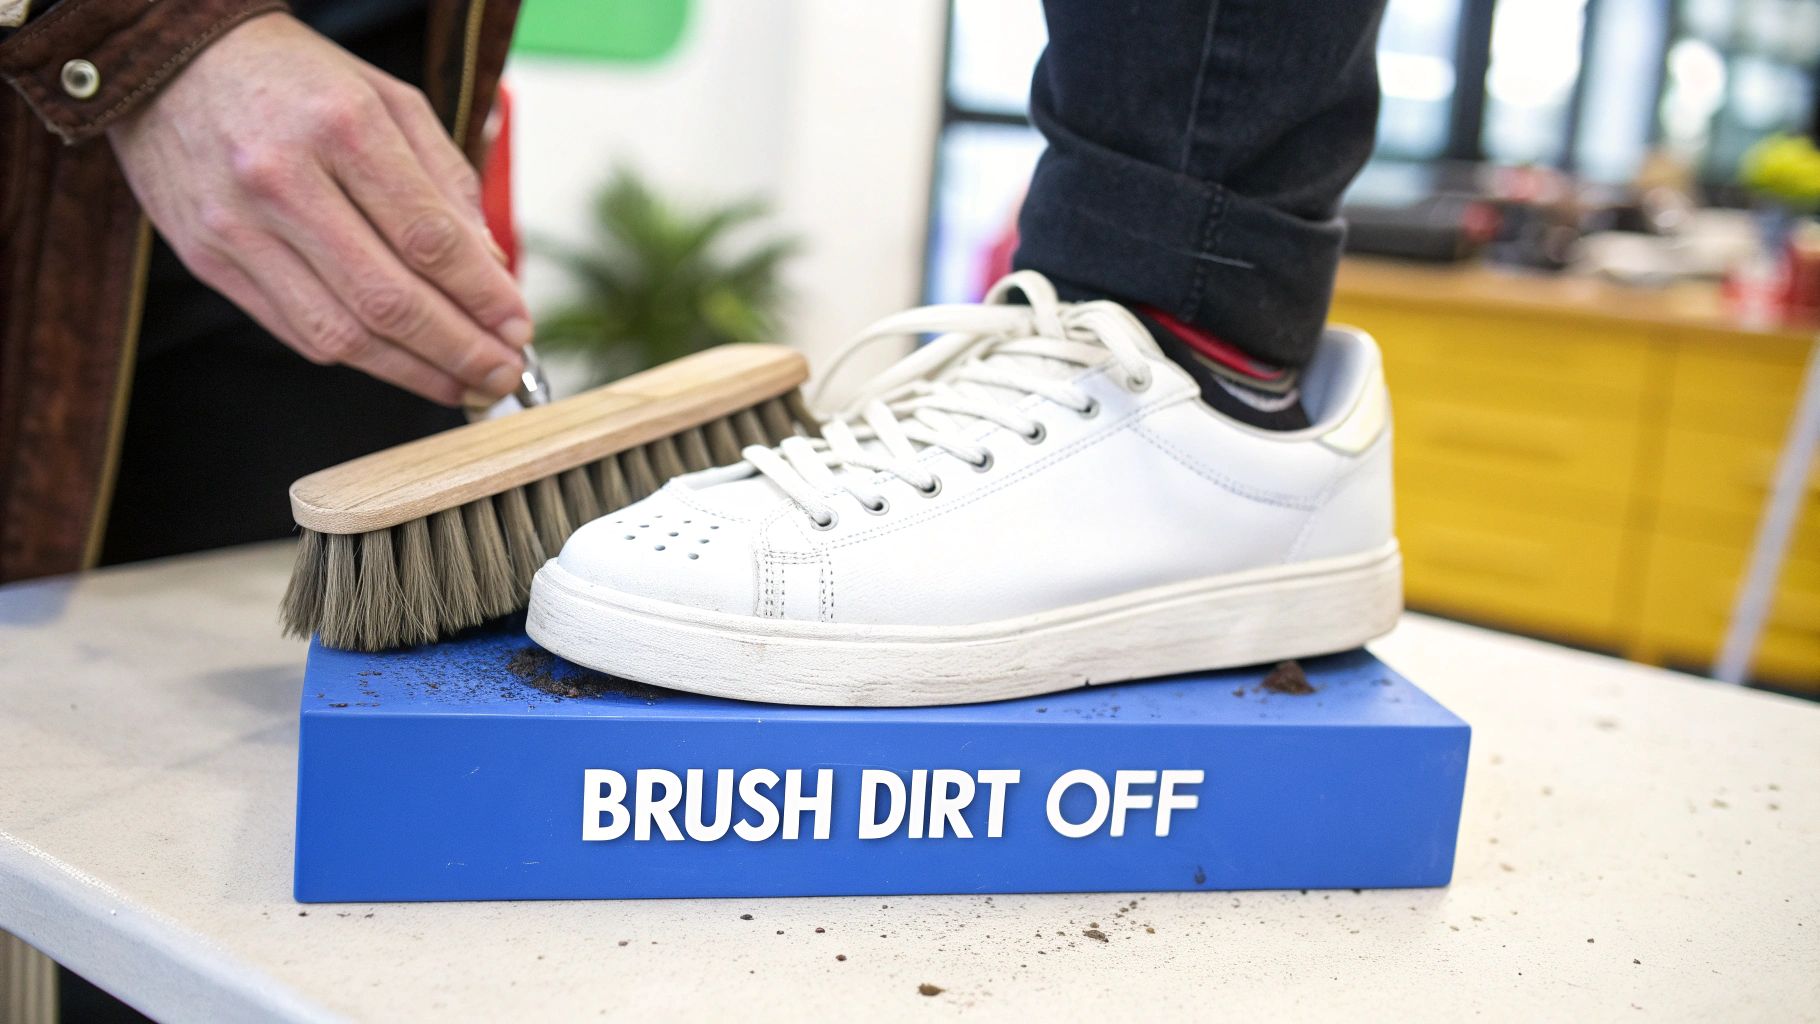
Once the laces and insoles are out, grab a dry, soft-bristled brush. Before you even think about introducing water or cleaner, your mission is to knock off all the loose, caked-on gunk from the surface. Gently brush the entire shoe, making sure to get into the seams and that little groove where the fabric upper meets the rubber midsole.
This dry-brushing step is so important. Why? Because if you don’t, you’ll just turn all that loose dust and dirt into a muddy paste the second you add liquid. A muddy mess is a real headache to clean and can easily spread, creating new stains. An extra minute here will save you so much frustration later.
Taking two minutes to remove the laces and dry-brush your sneakers is the secret sauce. It’s what elevates a quick rinse to a professional-level clean, ensuring everything gets evenly washed while preventing damage to the laces or the inside of your shoes.
So, Why Does This Pre-Cleaning Really Matter?
This initial prep isn’t just about making things look clean; it’s about preservation. By taking these simple preliminary steps, you’re not only making the actual washing process more effective but also protecting the shoe itself.
It Prevents Damage: Cleaning with laces still in can cause them to snag, fray, or get tangled. Leaving insoles in traps moisture, which is a fast track to funky odors and material breakdown.
It Guarantees a Deeper Clean: You simply can’t reach the hidden grime under the tongue and around the eyelets without getting those laces out of the way.
It Stops You From Making a Bigger Mess: A thorough dry brush gets rid of most of the surface-level dirt. This means your cleaning solution can get straight to work on the tougher, set-in stains instead of just pushing mud around.
Think of this groundwork as a non-negotiable part of how to clean white sneakers the right way. Once you’ve handled the prep, you’re perfectly set up to tackle the main event and bring that brilliant white back to life.
Hand-Cleaning Techniques for Any Sneaker Material
Alright, you’ve prepped your sneakers, and now it’s time for the real work: the cleaning itself. This is where a bit of know-how goes a long way. You can’t just attack every sneaker with the same brush and soap; each material has its own personality and needs a specific touch. Getting this right is the secret to learning how to clean white sneakers without accidentally ruining them.
Think of yourself as a restorer, not just a scrubber. Your patience here will be rewarded with sneakers that look practically brand new. Let’s start with the most common material out there: canvas.
The Baking Soda Method for Canvas Sneakers
Canvas shoes are fantastic, but they seem to attract dirt like a magnet. The good news is they’re also tough, which makes them perfect for a deep clean. The baking soda paste method is a classic for a reason—it’s brilliant for getting rid of grass stains, caked-on mud, and general grime.
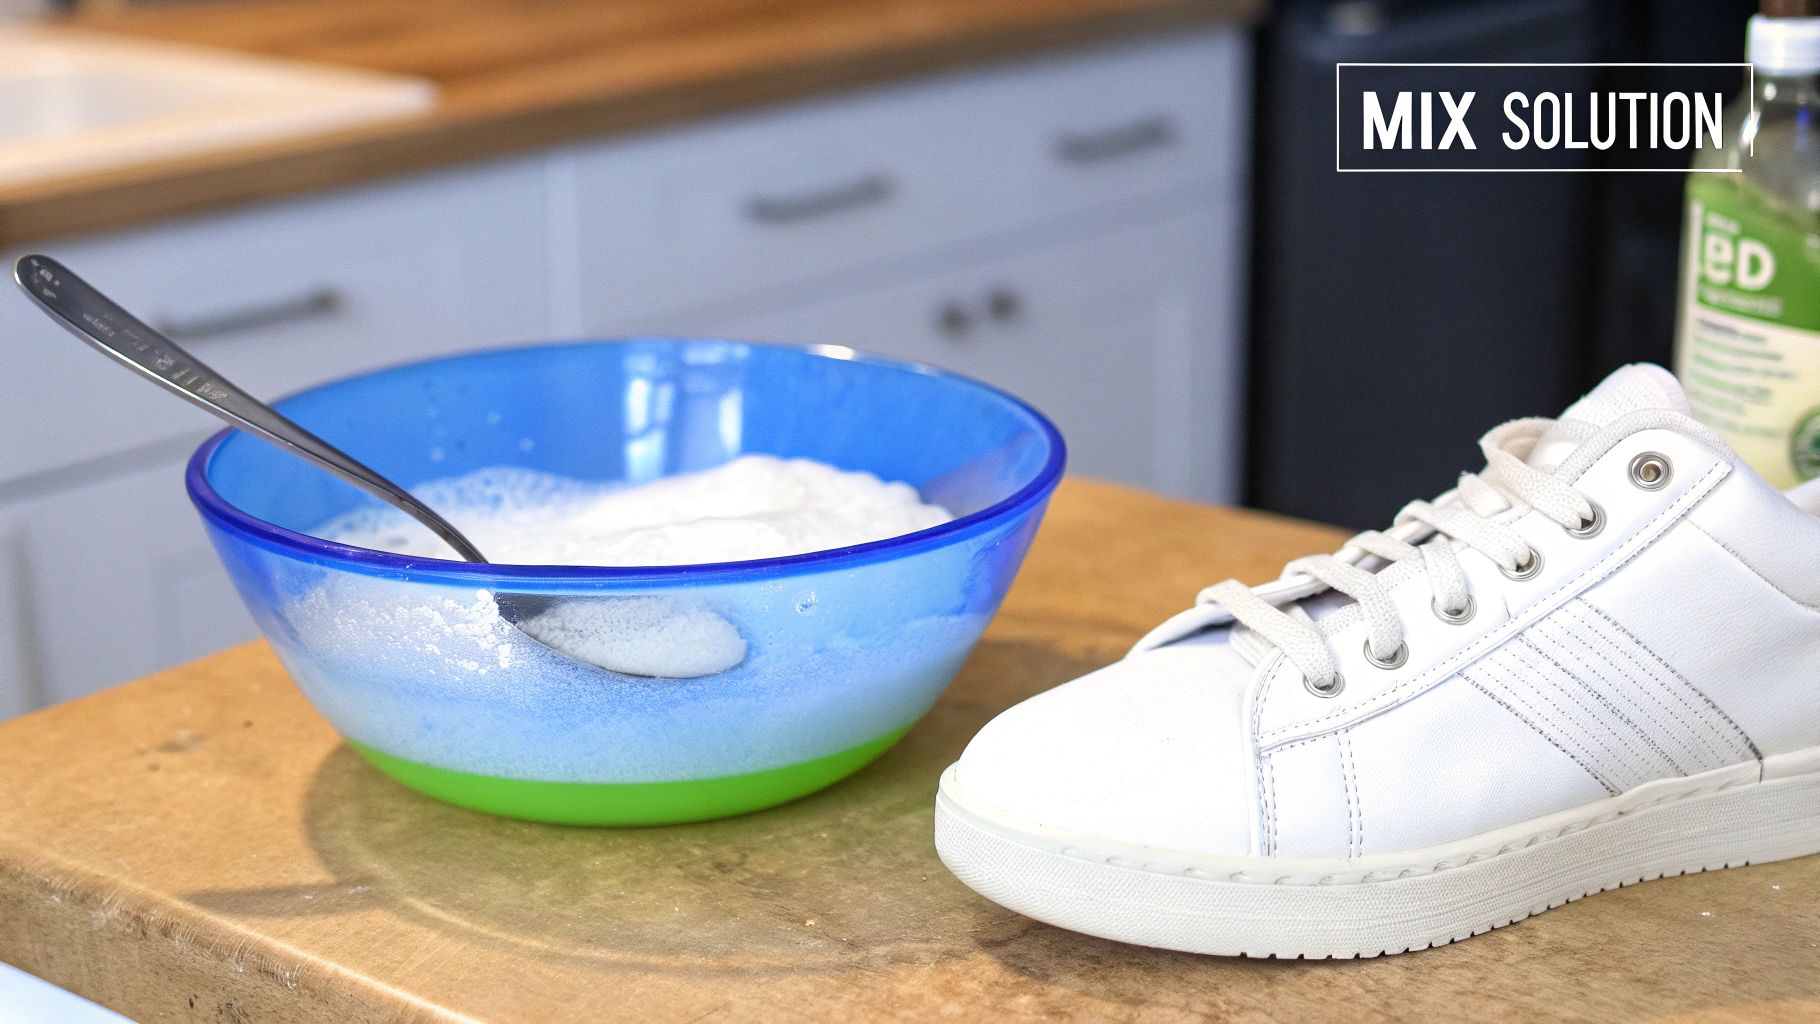
- In a small bowl, mix equal parts baking soda and warm water.
- Stir until you have a thick, smooth paste. If it’s too watery, add more baking soda.
- Dip your old toothbrush into the paste and apply it directly to the stains.
Work the paste into the fabric using gentle, circular motions. You’ll feel the mild abrasion from the baking soda lifting the dirt right out of the weave.
Once you’ve tackled all the spots, let the paste sit for about 15-30 minutes. Don’t get impatient here; this is when the magic happens as the paste breaks down the grime. When time’s up, grab a clean, damp microfiber cloth and wipe away the dried paste. The difference should be night and day.
A Gentle Approach for Leather
Leather sneakers demand a more delicate hand. The key is to clean the surface without stripping away its natural oils, which leads to dryness and cracking. Harsh chemicals and aggressive scrubbing are leather’s worst enemies.
For this, a simple solution of warm water mixed with a few drops of mild dish soap is all you need. Dip a microfiber cloth into the soapy water, wring it out until it’s just damp—not dripping wet—and gently wipe down the entire shoe. This is usually enough to handle surface dirt and light scuffs.
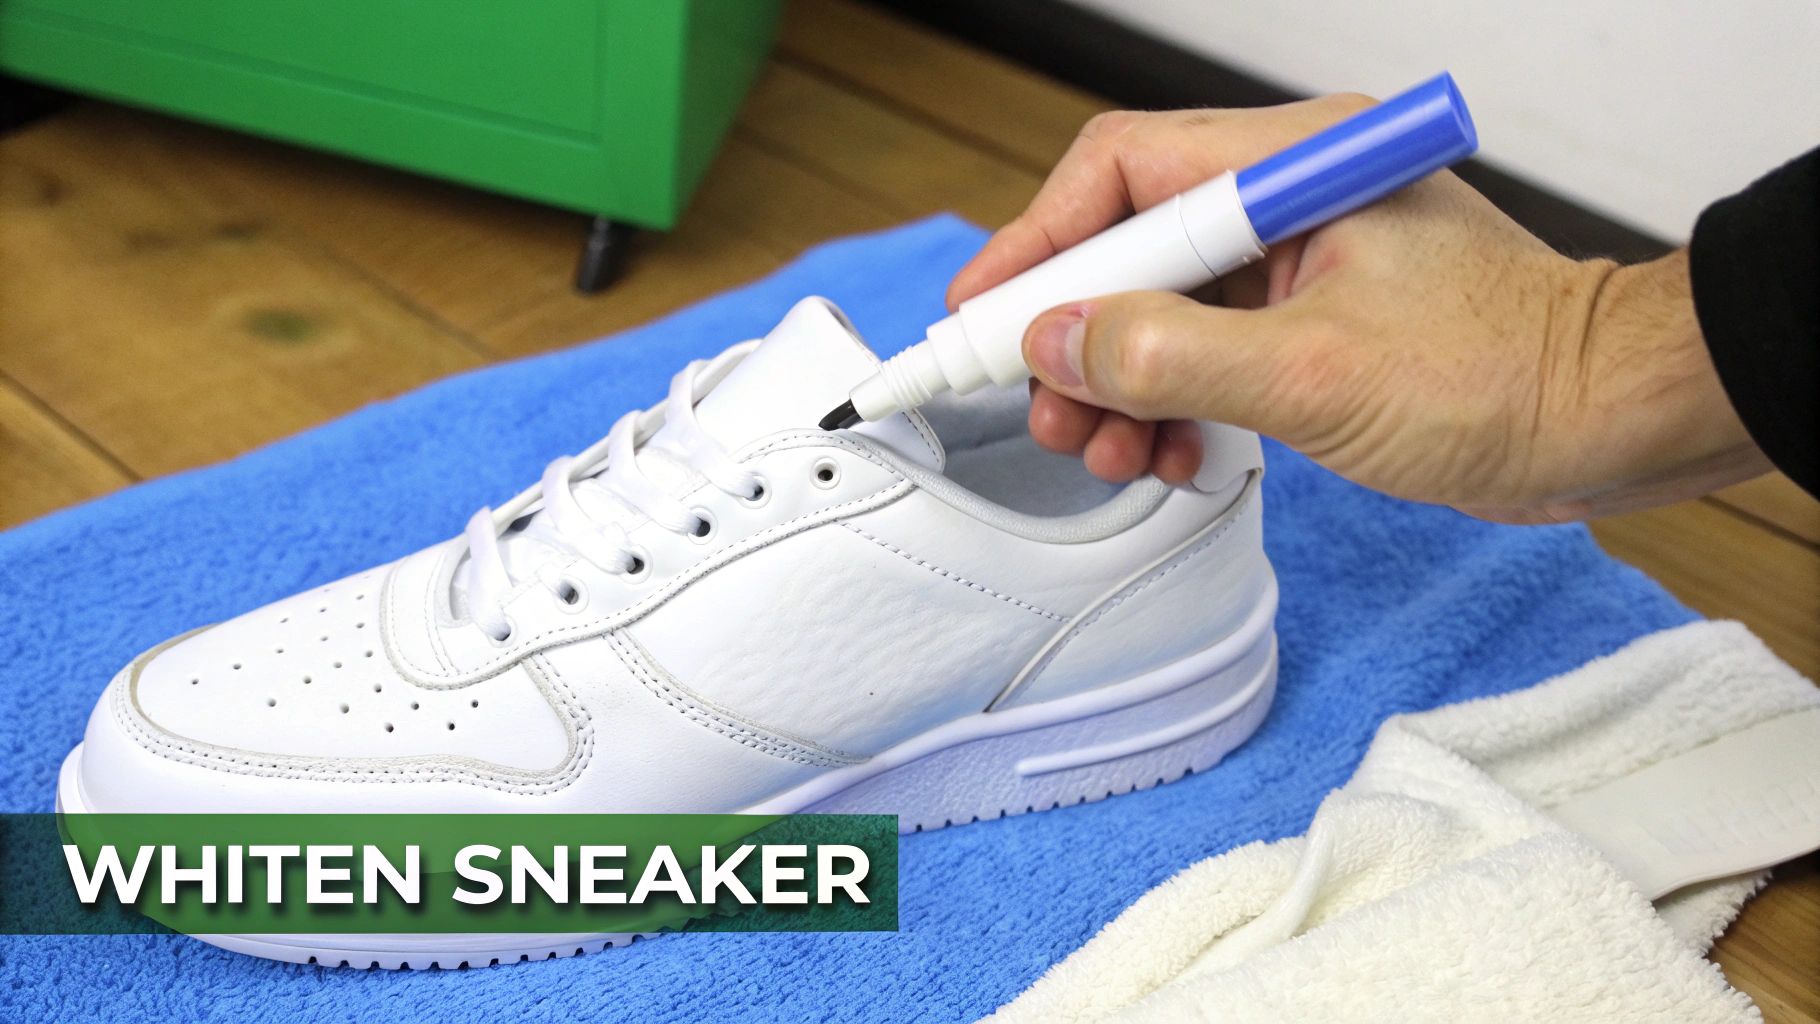
If you’re dealing with a more stubborn scuff mark, a magic eraser can be a lifesaver. Just dampen a corner of the eraser and rub the mark very gently until it vanishes. No matter what, always finish by wiping the area with a new, clean cloth dampened with just water to remove any lingering soap residue.
The most common mistake I see people make with leather is using too much water. Oversaturation can leave behind permanent water spots and even warp the material. Always use a damp cloth, never a soaking wet one.
The image below gives you a great visual for the rinse-and-dry stage, which applies to pretty much any sneaker after you’ve finished cleaning.
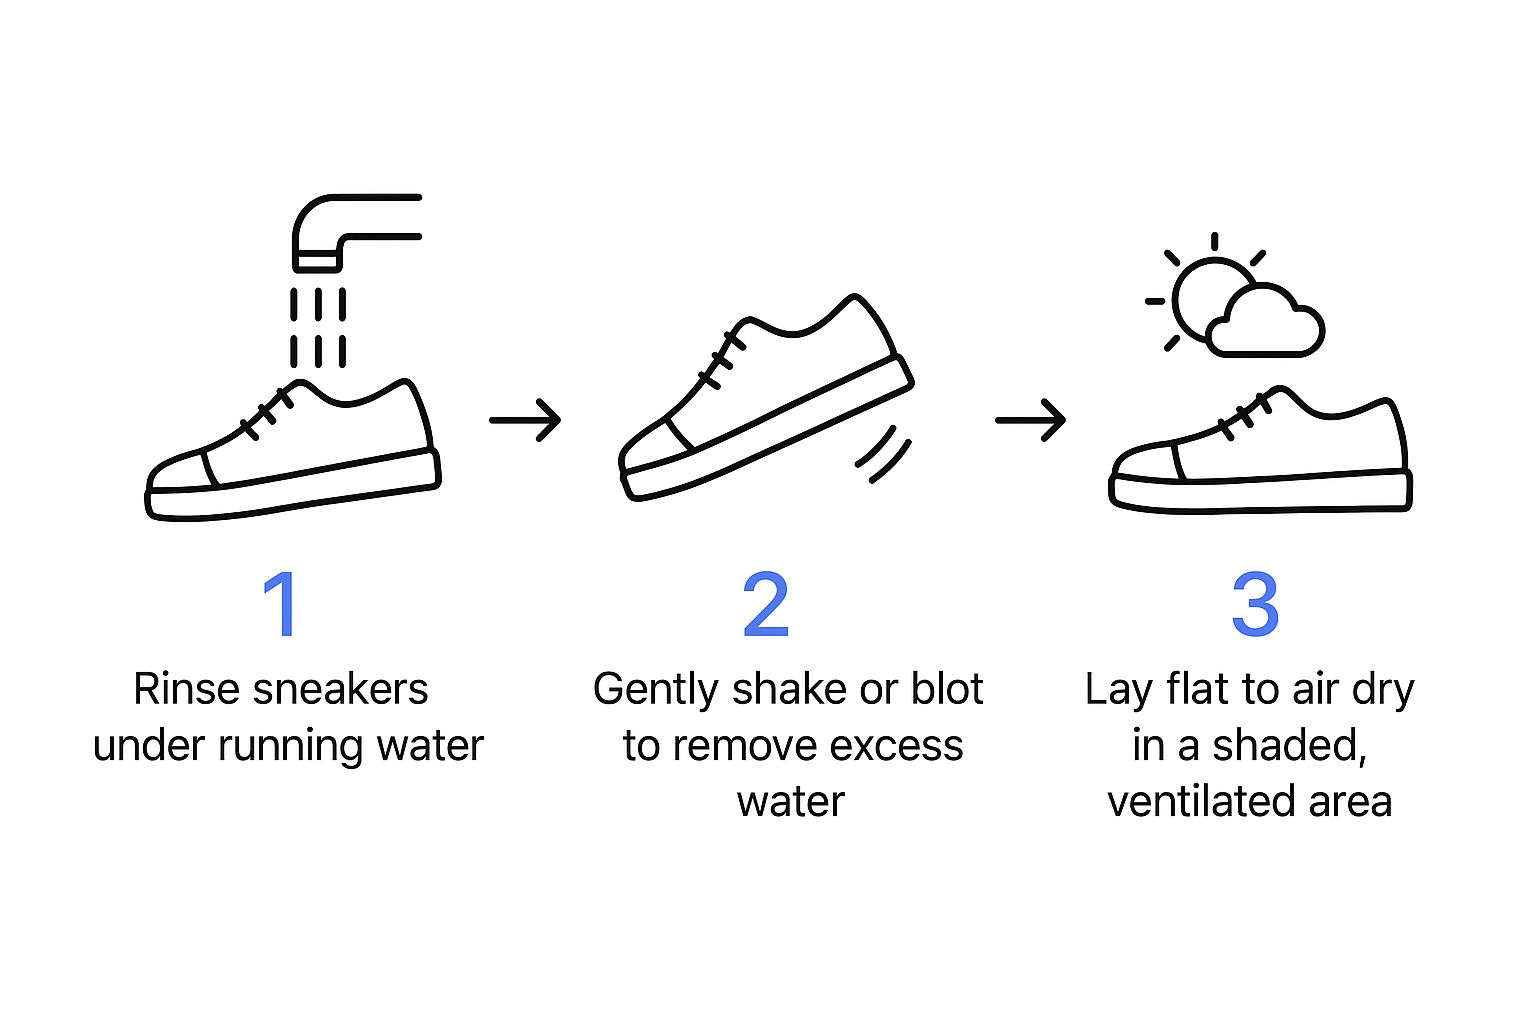
This simple guide is a good reminder to be gentle and give your shoes plenty of air to dry properly, which helps prevent those dreaded yellow stains from setting in.
The Dry Method for Delicate Suede
When it comes to suede, water is public enemy number one. It’s the most sensitive material of the bunch, which is why we have to use an almost completely “dry” cleaning method. Your two best friends here are a proper suede brush and a suede eraser.
First, take the brush and gently sweep away any loose dirt. Always brush in the same direction to keep the nap (the fuzzy texture) looking uniform.
For scuffs or more embedded spots, use the suede eraser just like a pencil eraser. Apply light, consistent pressure to lift the mark out. Afterwards, give it another quick brush to restore the texture. Often, this is all it takes to bring suede back to life. It’s this same level of careful attention you need when you maintain luxury designer sneakers, as they frequently use these same delicate materials.
When It’s Time to Machine-Wash Your Sneakers
Sometimes, a spot clean just won’t cut it. After a muddy festival or a particularly grimy commute, your sneakers need more than just a surface-level wipe-down—they need a deep, refreshing clean. This is where your washing machine can be a game-changer, but only for the right kind of shoes.
This method is fantastic for sturdy canvas kicks or most synthetic athletic shoes. However, it’s absolutely not for leather, suede, or any sneaker with delicate details or glued-on soles. The heat and tumbling can be brutal on those materials. So, before you even think about it, give your shoes a quick once-over to confirm they can handle the ride.
How to Prep for a Safe Machine Wash
Let’s be clear: you can’t just chuck your shoes into the washer and walk away. A little prep work is essential to protect both your sneakers and your machine. The sound of heavy shoes banging around an empty drum is not something you want to hear, and it can cause real damage.
Your first move is to pop your pre-cleaned sneakers into a mesh laundry bag. This is a lifesaver, as it keeps the laces from tangling up and wrapping themselves around parts of the machine they shouldn’t. No mesh bag? An old pillowcase knotted at the top works just as well.
Next, you’ll want to add some padding. Toss in a few old, heavy towels along with the bag. This does two important things: it balances the drum so your machine doesn’t start rattling violently, and it acts as a cushion, preventing your sneakers from getting beat up.
The biggest mistake I see people make is washing shoes by themselves. Adding towels is non-negotiable. It protects the machine’s drum, quiets the whole process down, and keeps your shoes from taking a beating.
The trend of machine-washing sneakers has really taken off in places like the UAE, where convenience is key for busy folks. In fact, many shoe brands now proudly label their sneakers as machine washable. The accepted best practice is to remove laces and insoles, brush off any caked-on mud, use a delicate bag, and run a gentle, cold cycle. You can find some great advice on this from brands that champion the practice, like the care guide on the Allbirds website.
Choosing the Right Washer Settings
With your sneakers safely bagged and buffered, the final step is selecting the right cycle. This is where you can either end up with sparkling clean shoes or a warped, discolored mess.
Always stick to these settings:
- Cycle: Choose the gentle or delicate cycle. Your sneakers don’t need a heavy-duty wash.
- Water Temperature: Use cold water, and only cold water. Heat is the enemy here; it can melt the glue holding your shoes together and warp the rubber soles.
- Detergent: A small amount of mild, liquid detergent is all you need. Powdered detergents don’t always dissolve properly in cold water and can leave a chalky film.
- The Golden Rule: Never, ever add bleach. It seems like the obvious choice for white shoes, but the chlorine can have a chemical reaction that permanently turns them a dingy yellow.
Following these steps will help you master how to clean white sneakers in the washing machine, giving them a new lease on life without causing any damage.