Cleaning white sneakers isn’t a one-size-fits-all job; it’s really about using the right technique for your shoe’s specific material. The best approach usually starts with a dry brush to knock off any loose dirt, followed by a gentle cleaning solution. I’ve found that simple mixes like mild soap and water or a baking soda paste work wonders. From there, it’s about targeted scrubbing on tough spots and then letting them air-dry properly, far away from direct sunlight.
Keeping Your White Sneakers Pristine in the UAE
This is your go-to guide for keeping those white sneakers looking box-fresh, specifically tailored for the unique challenges we face here in the UAE. We’re going to move beyond the generic advice you see everywhere and dig into why our intense sun and humidity demand a different kind of care. Think of this as your practical framework for getting brilliant results without damaging your favorite kicks.
In this climate, knowing how to properly clean white sneakers is less of a chore and more of a survival skill. The constant mix of sand, dust, and scorching heat can turn a perfect pair into a yellowed, grimy mess in no time. The real secret is to act fast and use methods that won’t backfire when exposed to our harsh sunlight.
A Smart Cleaning Strategy
A successful cleaning session really boils down to a few key phases. Getting this sequence right makes all the difference.
- Pre-Cleaning: Always start by getting the surface-level dust and sand off before you introduce any liquids.
- Targeted Stain Removal: Zero in on specific scuffs and spots with a concentrated cleaning solution.
- Washing: Gently clean the entire shoe upper with an agent that’s safe for the material.
- Drying: This is crucial. Let your sneakers air-dry completely in a shaded, breezy spot to prevent that dreaded yellowing.
Following a structured method like this ensures you get rid of the grime effectively without hurting the shoe’s material or shape. For a more comprehensive look at shoe maintenance, our ultimate guide to sports sneaker care offers some fantastic insights.
It turns out, local habits really back up this careful approach. Recent findings show that in the United Arab Emirates, about 65% of white sneaker owners clean them regularly. What’s more, a whopping 72% prefer to use gentle homemade solutions instead of harsh chemicals. This just highlights how important it is to use gentle, effective techniques to maintain that fresh-out-of-the-box look, especially when you’re trying to avoid the yellowing that bleach can cause in sunny climates.
To make this even easier, here’s a quick-glance table that breaks down the process.
Quick Guide to Cleaning White Sneakers in the UAE
This table summarizes the essential stages for cleaning white sneakers, from initial prep to final drying.
| Stage | Action | Why It Matters in the UAE |
|---|---|---|
| Preparation | Use a soft, dry brush to remove loose sand and dust. | Prevents scratching the material and turning dust into mud when you add liquid. |
| Spot Treatment | Apply a paste of baking soda and water to specific stains. | Gently lifts stains without the harsh chemicals that can react with sunlight. |
| All-Over Wash | Use a soft cloth with mild soap and water to clean the uppers. | Safely cleans materials like canvas and leather without causing discoloration. |
| Drying | Air-dry in a well-ventilated, shaded area away from direct sun. | Direct sun is the #1 cause of yellowing on white shoes, so shade is essential. |
Following these steps will help you combat the environmental challenges in the UAE and keep your sneakers looking their best for much longer.
Building Your Essential Sneaker Cleaning Toolkit
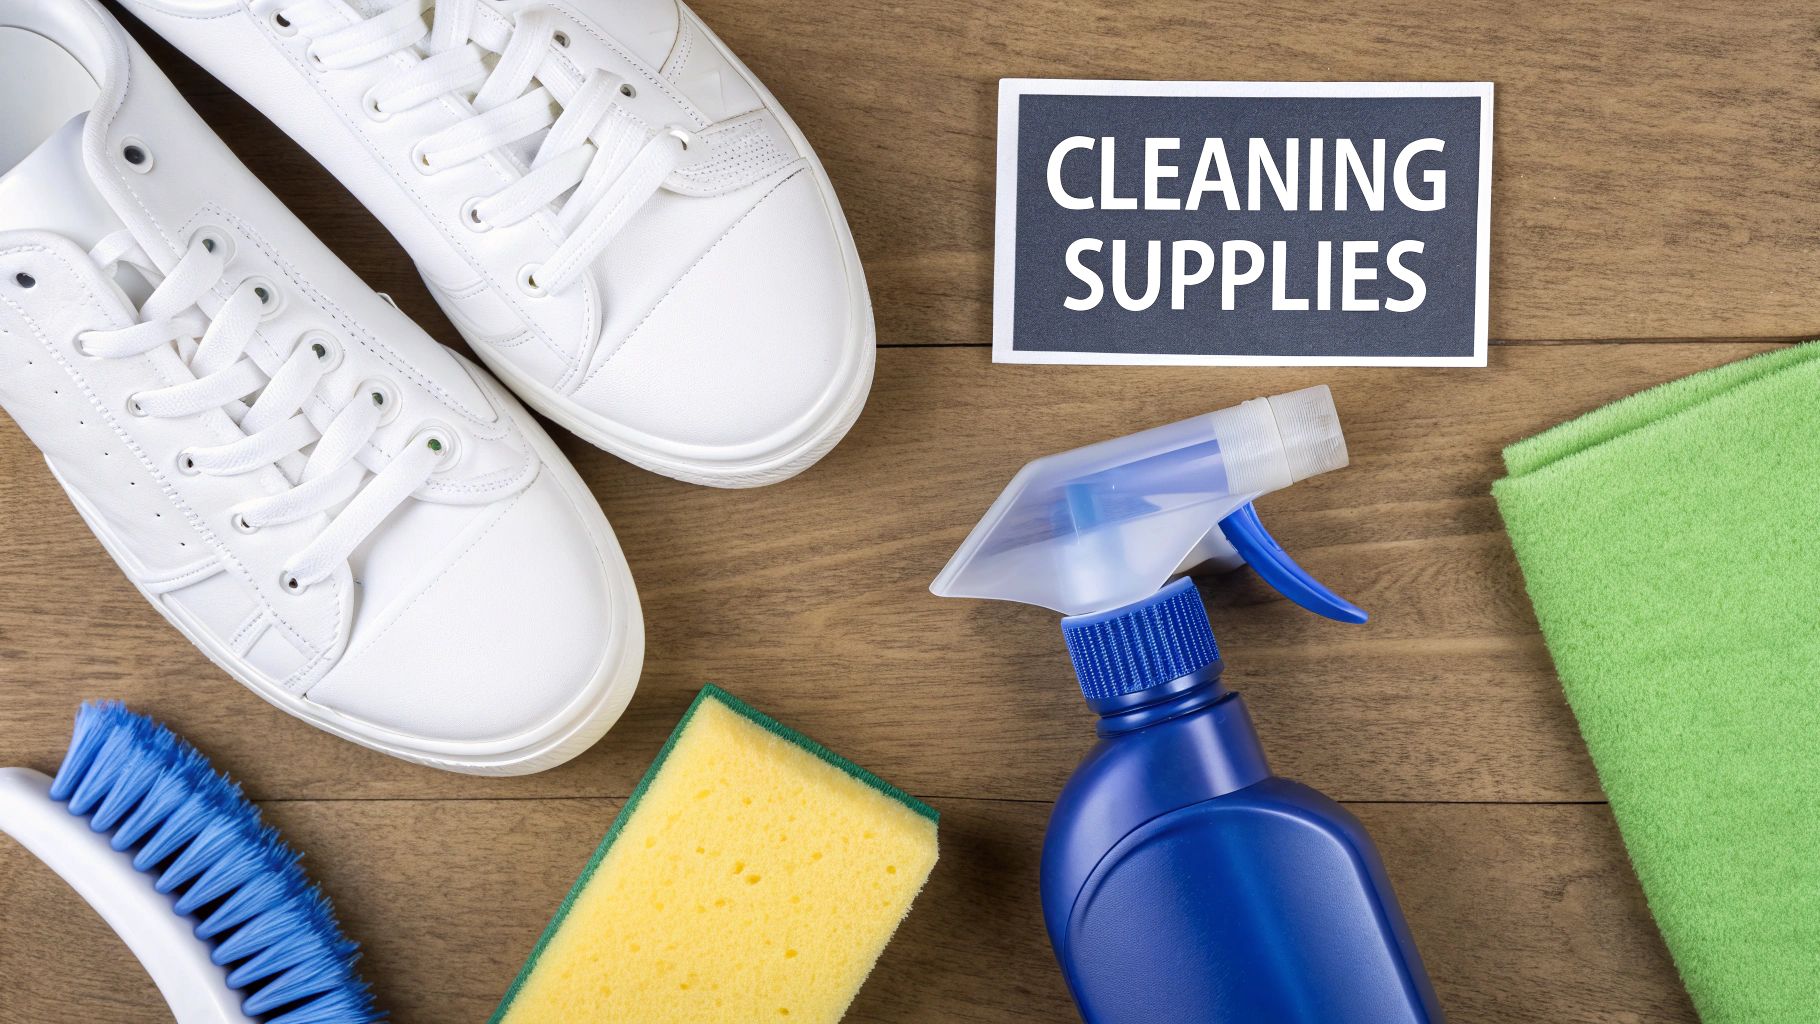
Before you can even think about tackling those scuffs and stains, you’ve got to get your gear in order. Having a dedicated cleaning kit on hand makes the whole process smoother and, frankly, gets you much better results without accidentally ruining your favorite pair.
Think of it like being a chef—you wouldn’t start cooking without your knives sharpened and ingredients prepped. The goal here is to build a smart, versatile kit that can handle anything from a light dusting to a stubborn, set-in stain. You really don’t need to break the bank; just a few core items will cover most of what you’ll run into.
The Core Cleaning Supplies
These are your absolute must-haves. For almost any sneaker cleaning job, especially with the fine sand and dust we get here in the UAE, you’ll want these within arm’s reach.
- A Soft-Bristled Brush: This is your first line of defense. It’s perfect for getting surface dirt off without scratching up delicate materials like canvas or knit uppers. An old toothbrush is a fantastic substitute for getting into those tight seams and around the eyelets.
- Microfiber Cloths: You’ll need at least two of these. Use one for applying your cleaning solution and a second, clean one for drying and buffing. They’re super absorbent and, most importantly, won’t leave behind lint like regular towels.
- A Gentle Cleaning Solution: You’ve got a couple of great choices. You can always grab a specially formulated sneaker cleaner, but a DIY solution works wonders. Just a few drops of mild dish soap mixed into warm water is surprisingly powerful.
For a DIY paste that really packs a punch against tough spots, try mixing equal parts baking soda and white vinegar. It will fizz up and create a paste that lifts scuffs right off, especially from rubber midsoles and toe caps. It’s a classic trick for a reason.
Upgrading Your Toolkit
Got the basics down? A few extra tools can really elevate your sneaker care game, helping you tackle specific problems and protect your shoes for the long haul.
- Magic Eraser: This little sponge is your secret weapon against stubborn scuffs on leather and rubber. Just get a corner damp, rub the mark gently, and watch it disappear. It really does feel like magic.
- Shoe Trees: These aren’t exactly a cleaning tool, but they are absolutely essential for the after-care. Popping cedar or plastic shoe trees into your sneakers after a wash helps them hold their shape as they dry. Plus, they pull out any lingering moisture, which is a big deal in our humid climate.
Getting this simple toolkit together means you’re ready for pretty much any cleaning challenge. The core ideas—using gentle tools and the right cleaners—apply whether you’re reviving your daily beaters or pampering high-end kicks. In fact, these foundational techniques are the perfect starting point, and if you want to dive deeper into specialized care, you can read our guide on how to maintain designer sneakers.
Cleaning Different Sneaker Materials Like a Pro
The real secret to making your white sneakers shine isn’t some mythical, all-in-one cleaning hack. It’s about knowing your materials. The technique that makes your leather sneakers look brand new could absolutely destroy a pair of delicate suede shoes.
Getting this right means tailoring your approach. Let’s walk through the right way to clean each type of sneaker so you get those brilliant results without accidentally causing any damage.
This visual guide breaks down the hands-on process, showing you what it really takes to bring your favorite pair back from the brink.
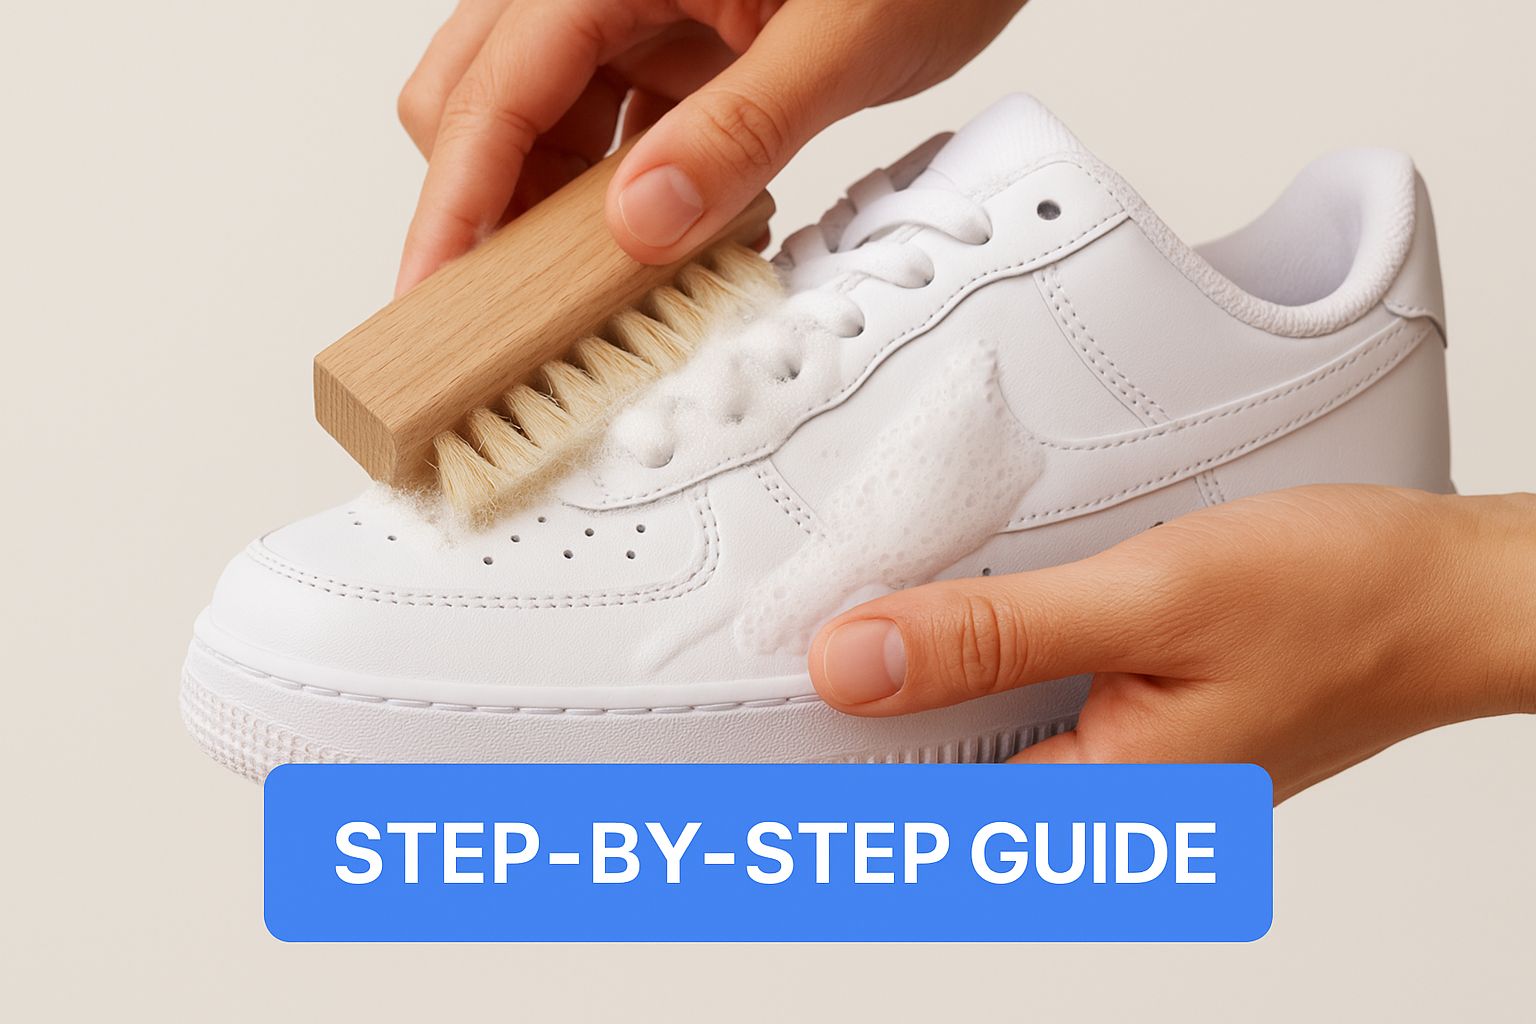
As you can see, a little bit of gentle scrubbing with the right cleaner is a common theme, but the specifics are what really count.
Restoring Classic Leather Sneakers
There’s a reason white leather sneakers are such a timeless staple—they’re tough and surprisingly easy to clean, as long as you’re gentle. For everyday grime, all you really need is a soft cloth dipped in a simple mix of warm water and a few drops of mild dish soap. Wipe down the entire surface, making sure to get into the seams where dirt and dust love to collect.
But what about those stubborn scuffs on the leather or the rubber midsole? This is where a magic eraser becomes your secret weapon. Just dampen a corner of the eraser and lightly buff the mark. You’ll be amazed at how easily it lifts away, leaving behind that clean, uniform finish. Just remember to be gentle and don’t scrub too hard on the leather itself, or you might dull its natural shine.
Tackling Canvas and Fabric Sneakers
Canvas sneakers, like your trusty Converse or Vans, are magnets for dirt and stains. Because the fabric is so absorbent, you need something that can pull the grime out from deep within the fibers. The best tool for the job is a simple homemade cleaning paste.
- Mix the Paste: Combine equal parts baking soda and warm water. Stir until you have a thick, smooth paste that’s easy to spread.
- Apply and Scrub: Grab an old toothbrush and work the paste into the stained areas of the canvas. Use small, circular motions to really get it in there.
- Let It Work: Leave the paste on the sneakers for about 15-20 minutes. As it dries, it will work like a magnet, pulling the dirt right out of the fabric.
- Rinse and Dry: Once the paste is fully dry, clap the sneakers together to knock off the hardened residue. Use a clean, damp cloth to wipe away anything that’s left.
This DIY paste is my go-to for deep-cleaning canvas because it’s incredibly effective without the harsh chemicals that can cause yellowing over time.
A quick word on machine washing: Yes, you can, but you have to be careful. Always take out the laces and insoles first. Then, place the sneakers in a mesh laundry bag and run them on a gentle cycle with cold water. Never put them in the dryer—let them air-dry to avoid damage.
The Delicate Art of Cleaning Suede
Suede is hands-down the trickiest material to clean. It’s incredibly sensitive to water, which can leave behind permanent stains and ruin the soft, velvety texture. Your approach here needs to be almost entirely dry.
Your two essential tools for suede care are a suede eraser and a suede brush. Think of the eraser like a pencil eraser for your shoes; it’s designed to gently rub away dry dirt and scuffs from the surface. For marks that are a bit more set-in, just apply a little more pressure.
After you’ve erased the dirt, use the suede brush to restore the nap—that’s the soft, fuzzy texture of the material. Brushing gently in one direction will lift the fibers and bring back that fresh-out-of-the-box look. Water should be your absolute last resort, used only for the most stubborn stains and applied sparingly with a cloth, never poured directly onto the shoe.
Sneaker Cleaning Methods by Material
To make it even easier, here’s a quick cheat sheet that breaks down the best cleaning methods for the most common sneaker materials. Think of it as your go-to reference before you start any cleaning project.
| Material | Best Cleaning Agent | Recommended Tool | Key Precaution |
|---|---|---|---|
| Leather | Mild dish soap and water | Microfiber cloth, magic eraser | Avoid harsh scrubbing to protect the leather’s finish. |
| Canvas | Baking soda and water paste | Soft-bristled brush or toothbrush | Never use a machine dryer; always air-dry to prevent shrinking. |
| Suede | No liquid, if possible | Suede eraser and brush | Avoid water at all costs to prevent staining and texture damage. |
By matching your cleaning technique to the specific material of your sneakers, you’re not just cleaning them—you’re preserving them. This is how you guarantee a safe, effective clean every single time.
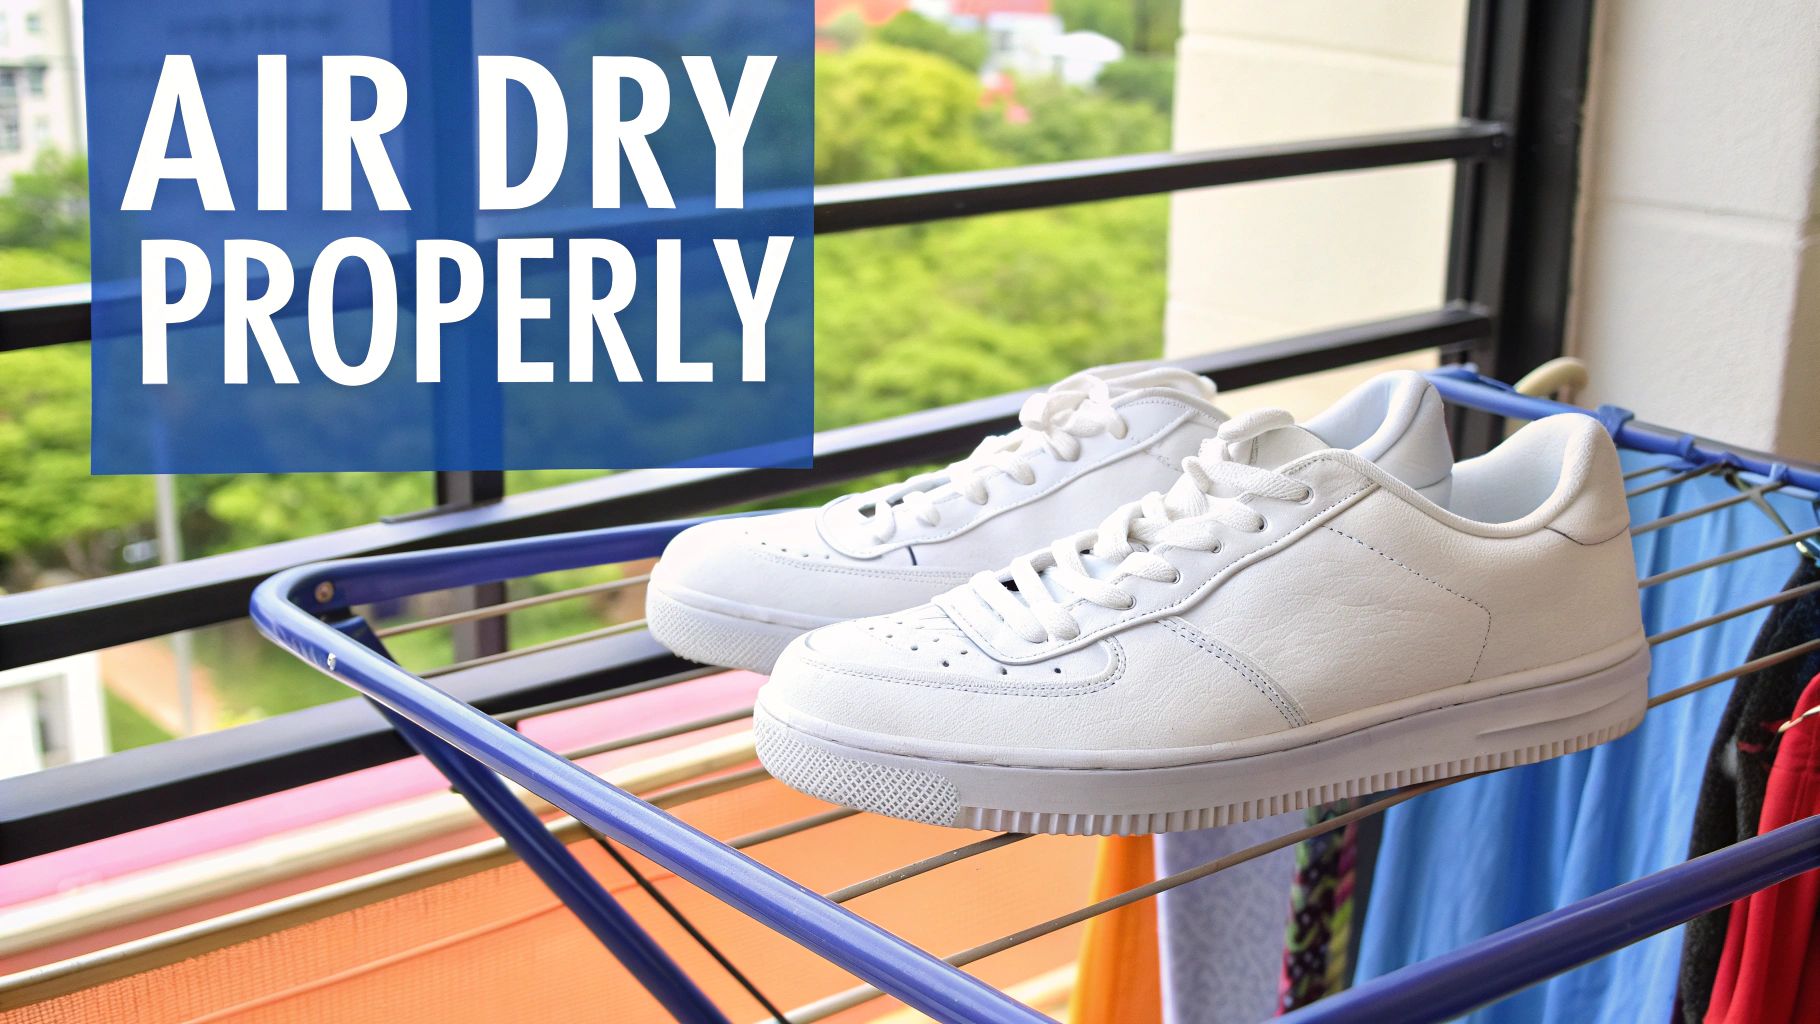
The Critical Steps for Drying and Finishing
https://www.youtube.com/embed/dfJi49umT6U
You’ve done the hard work of scrubbing and treating, but how you handle the next steps—drying and finishing—is just as crucial. A poor drying technique can undo all your progress, leading to yellowing, warping, or even a musty smell. This is especially true here in the UAE, where the intense sun and humidity can be a sneaker’s worst enemy.
Tossing your freshly cleaned sneakers into direct sunlight might seem like a quick fix, but it’s one of the biggest mistakes you can make. The sun’s harsh UV rays can react with any leftover cleaning agents or the shoe materials themselves, causing them to turn a frustrating shade of yellow. Similarly, using a machine dryer is completely off-limits. The high heat can melt the glues holding your shoes together, shrink fabrics, and permanently warp their shape.
The Right Way to Air-Dry
When it comes to drying, patience is your best friend. The goal is to let your sneakers dry slowly and evenly in a spot with great air circulation.
- Choose the Right Spot: Find a shaded, well-ventilated area for them to rest. This could be a balcony out of direct sun, a utility room with a fan running, or just an airy corner inside your home.
- Stuff Your Shoes: To help them keep their shape and absorb moisture from the inside, stuff them with white paper towels or clean, white rags. Steer clear of newspaper, as the ink can easily bleed onto the damp fabric.
- Use Shoe Trees: For an even better result, insert cedar shoe trees. They are fantastic at wicking away moisture and helping your sneakers maintain their perfect form as they dry.
This careful approach is more common than you might think. A study on UAE consumer habits found that 68% of sneaker owners follow recommended drying times of at least 8 hours in shaded spots to avoid the region’s intense sunlight. That same study also noted that prompt stain treatment boosts cleaning success by over 30%, really highlighting the importance of acting fast. You can learn more about these consumer habits and their impact on sneaker care.
Pro Tip: Don’t forget the insoles! If you removed them for cleaning, let them air-dry completely on their own. This speeds up the overall drying time and ensures no moisture gets trapped deep inside the shoe, which is a common cause of those musty odors.
Finishing Touches for a Flawless Look
Once your sneakers are completely dry to the touch, a few final steps can take them from just “clean” to looking brand new again.
First, give the laces some attention. They often collect just as much grime as the shoes themselves. You can easily hand-wash them in a small bowl with some soapy water or, for a simpler approach, place them in a mesh laundry bag and toss them in with your next load of whites. Once they’re clean and dry, re-lacing your sneakers with those crisp, bright-white laces makes a huge difference.
Finally, think about adding a layer of protection. A quality stain and water repellent creates an invisible shield that helps fend off future dirt, spills, and water spots. Just a light, even coat is all you need to give your freshly cleaned sneakers a fighting chance against the elements. Trust me, this finishing step makes your next clean so much easier.
Proactive Care to Keep Your Sneakers White
While mastering how to clean white sneakers is a crucial skill, the real secret is shifting your mindset to proactive care. Honestly, the best way to keep your shoes looking box-fresh is to stop them from getting filthy in the first place. This is all about creating a simple maintenance routine that defends against the daily grind.
This isn’t about being precious with your favorite kicks and never wearing them. It’s about smart prevention. By taking just a few quick steps after each wear, you’ll drastically cut down on the time and elbow grease needed for those deep cleaning sessions. It’s the difference between a quick five-minute wipe-down and a full-blown weekend restoration project.
Trust me, a little preventative care goes an incredibly long way.
Your First Line of Defence: A Repellent Spray
Think of a good quality stain and water repellent spray as an invisible force field for your sneakers. This is, without a doubt, the most important proactive step you can take. These sprays work by creating a barrier on the shoe’s surface that makes liquids bead up and roll right off instead of soaking in and leaving a nasty stain.
Applying it is simple, but getting it right is key for the best results.
- Start with a Clean Slate: Always apply the spray to brand-new sneakers or a pair that has been freshly cleaned and is completely dry.
- Get Some Air: Use the spray in a well-ventilated area. I always do this outside on the balcony to be safe.
- Apply an Even Coat: Hold the can about 15-20 centimetres away from the shoe and spray a light, even layer over the entire surface. You don’t want to soak it.
- Let It Cure: Give the sneakers at least a few hours to dry completely, or follow whatever the product instructions say, before you wear them out.
This one simple treatment is surprisingly effective against accidental spills and unexpected rain, buying you valuable time to wipe away a mess before it becomes permanent.
A common mistake I see is people drenching their shoes in the spray, thinking more is better. This can actually leave a sticky residue or even change the fabric’s texture. A light, even coat is all you need for solid protection.
Smart Storage and On-the-Go Fixes
How you store your sneakers and what you do about daily scuffs can make a world of difference. Tossing them in a heap by the door is an open invitation for dust to settle in and cause gradual discoloration.
A much better approach is to keep them in their original box or on a dedicated shoe rack. Make sure it’s away from direct sunlight, which is notorious for yellowing white materials.
For those little scuffs that just happen, being prepared is everything. I always recommend keeping a packet of sneaker wipes or a magic eraser in your bag or car for quick touch-ups. When you notice a mark, deal with it right then and there. A quick wipe can lift a fresh scuff in seconds, stopping it from getting ground into the material and turning into a stubborn stain you’ll have to fight with later.